How to Add Your Authorized IP in HighProxies
In order to connect to your proxies, you need to authorize your IP address. This ensures that only your devices can access the proxies securely. Follow the steps below to add or update your authorized IPs.
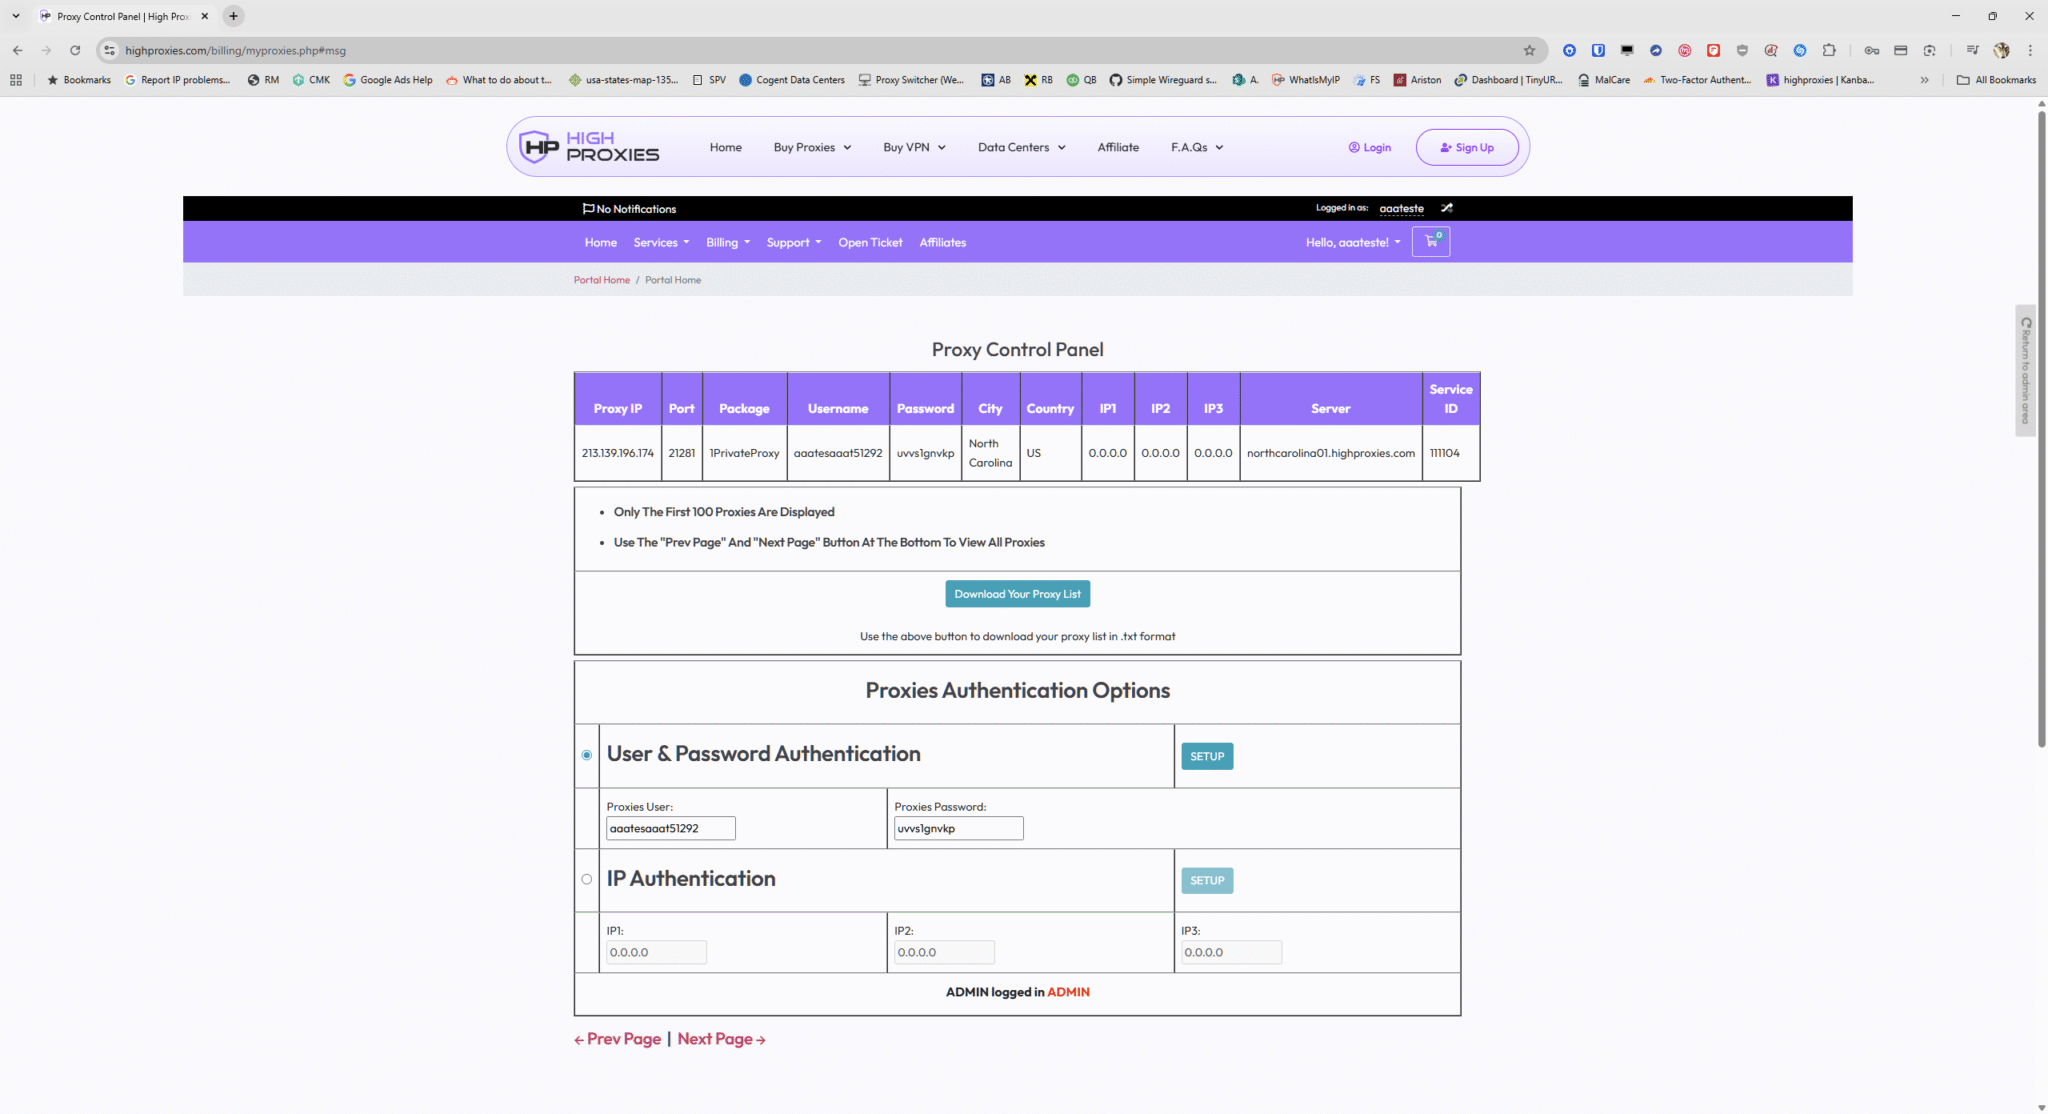
Step 1: Log in to Your Account
Go to https://highproxies.com/billing/myproxies.php
Alternatively, log in to HighProxies Client Area and navigate to: Services > My Proxies.
Step 2: Add Your IP Address
Inside the Proxy Control Panel, you will see three fields labeled IP1, IP2, and IP3. These represent the devices or servers you wish to authorize.
- Enter your current computer IP address
- Or enter your VPS/server IP address
- Optionally, authorize a mobile device IP
Step 3: Save Your Settings
Once you’ve entered your IP(s), click on the SETUP button to apply changes. Your authorized IPs will be updated instantly.
Notes
- You can authorize up to 3 IP addresses/devices (IP1, IP2, IP3).
- Make sure to update your authorized IP if your ISP changes it (common for dynamic IPs).
- For VPS or dedicated servers, use the server’s static IP address for best reliability.
Proxy Control Panel Screenshot
By keeping your authorized IPs up to date, you ensure secure, fast, and uninterrupted access to your HighProxies services.
